Setting up the EmployeeShield® banner
This guide will help you set up the EmployeeShield® Banner, walking you through its activation and customization. Setup includes two main tasks:
- Enabling the banner and setting banner options
- Configuring the Graphus Feedback app
Enabling the banner and setting banner options
IMPORTANT The EmployeeShield setting is disabled when Graphus is in Monitoring mode.
To start, log in as an admin and select the desired organization.
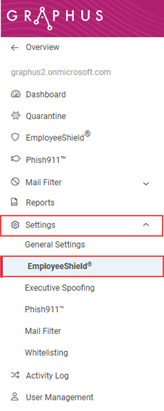
- In the navigation pane, select Settings > EmployeeShield®.
- Click the EmployeeShield® Banner toggle to enable it.
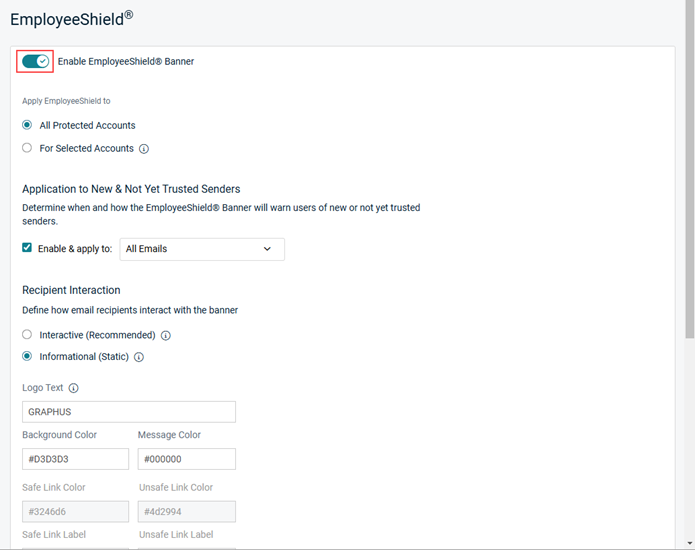
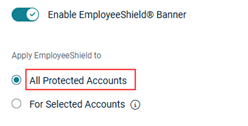
- By default, EmployeeShield® will be rolled out for all protected inboxes. You can enable EmployeeShield® for selected users only by selecting the For Selected Accounts option and entering the applicable email addresses.
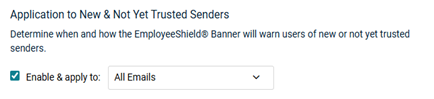
- For a banner to be displayed on emails from new or not yet trusted senders, in the Application to New & Not Yet Trusted Senders section, verify the Enable & apply to check box is selected. It is recommended that All Emails be selected in the list.
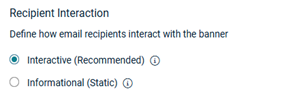
- In the Recipient Interaction section, Interactive is pre-selected. The banner will appear with interactive links allowing recipients to report an email as Phishing (Unsafe) or False Positive (Safe). If you select Informational, the banner will only provide information and there will not be any interactive links available to the recipients.
-
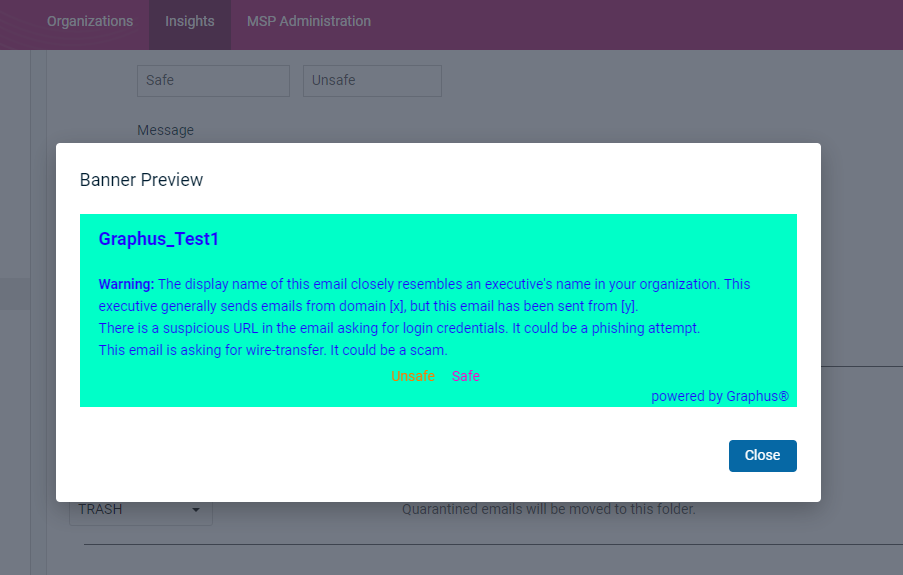
You can customize the following banner elements:
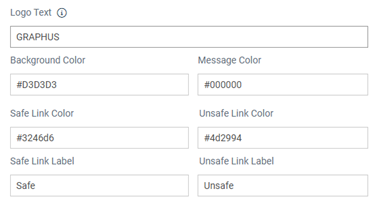
- Logo Text: This is the organization name that will appear in the upper-left corner of the EmployeeShield® Banner.
- Background Color: Click inside the box to display the color palette. Select a color and click Done.
Note: Perform the same steps to change the color of the other banner elements described below.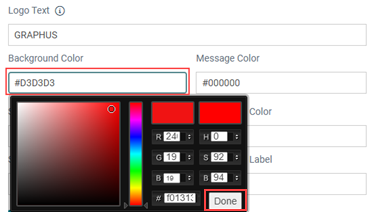
- Message Color: Select a color for your message text.
- Safe Link Color: Select the safe link color.
- Unsafe Link Color: Select the unsafe link color.
- Safe Link Label: Provide a custom label for the safe link. This is the link the recipient would click if they believe the email is a false positive.
- Unsafe Link Label: Provide a custom label for the unsafe link. This is the link the recipient would click to mark the email as a phishing attack.
- When you select the Enable Mail Filtering checkbox, the Personal Filter is enabled. This provides individual mail filtering functionality to each email recipient.
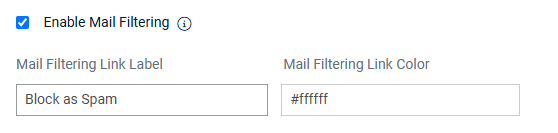
When a recipient determines that an email is unwanted and should be blocked, the recipient can mark the email as spam in the EmployeeShield banner. Before you can enable mail filtering, the following options must be set:- Application to New & Not Yet Trusted Senders:Enable & apply to is selected.
- Recipient Interaction:Interactive is selected.
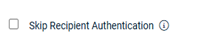
- Skip Recipient Authentication: Not selected.
For information, see the article Setting up the Personal Spam Filter for graymail filtering.
- By default, links and attachments included in quarantined emails are accessible to end users.
- To prevent users from interacting with these potentially malicious items, select the Enable Link & Attachment Protection check box.
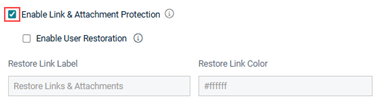
This replaces the malicious links and attachments within the quarantined email with placeholder information, as highlighted in the example below.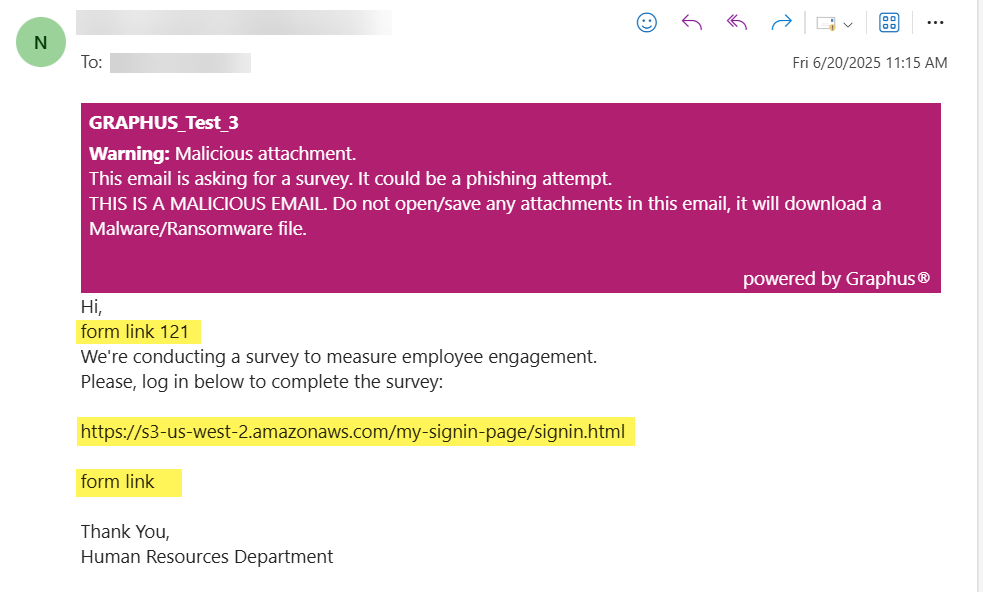
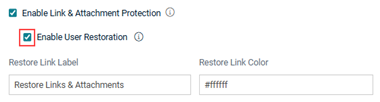
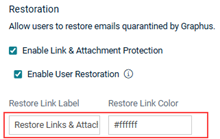
- If you want to allow end users to restore links and attachments within emails they believe are safe, select the Enable User Restoration check box.
- Review the confirmation dialog box carefully.

If you decide you don't want to allow users to restore links and attachments, click Cancel. To allow restoration, click Save & Continue. This provides a restoration link in quarantined emails.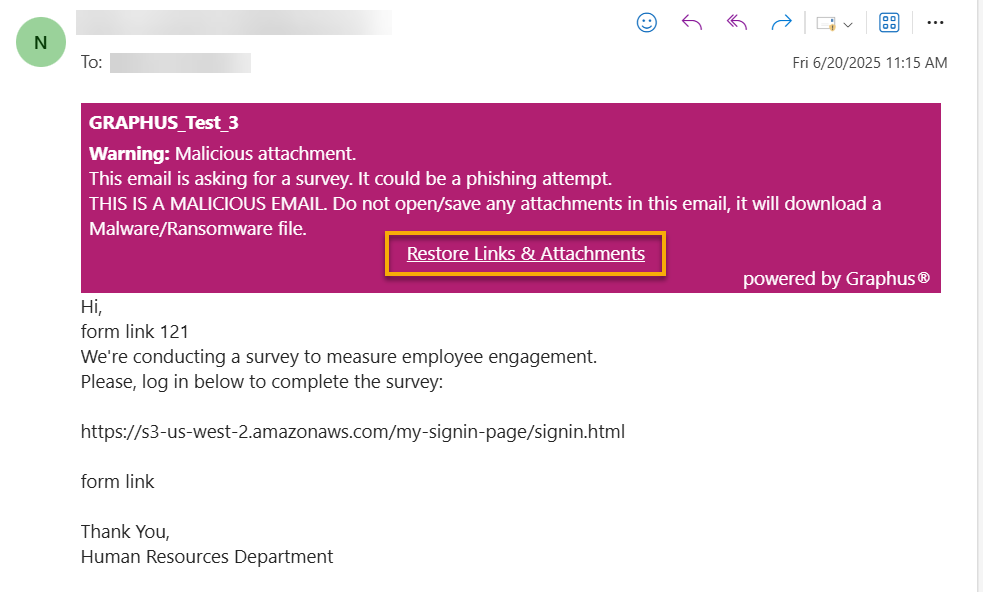
- If desired, you can customize this link by specifying a label and selecting a color in the Restore Link Label and Restore Link Color fields.
- To prevent users from interacting with these potentially malicious items, select the Enable Link & Attachment Protection check box.
IMPORTANT Users cannot restore links or attachments if Graphus has quarantined the email due to a confirmed malicious link or attachment.
- If you want to include footer content within the banner, select the Enable Footer check box.
The phrase Powered by Graphus will appear automatically in the footer. If desired, you can provide your own custom content in the Footer Message field.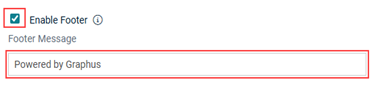
- To allow email recipients to provide feedback in the EmployeeShield banner for emails Graphus has flagged as potentially malicious and therefore has quarantined, select the Allow feedback on System quarantined emails check box.

System-quarantined emails will appear in recipients' Deleted Items directory with an EmployeeShield banner warning that the sender’s domain is not yet trusted by your organization. The banner includes options to mark the email as Unsafe or Safe.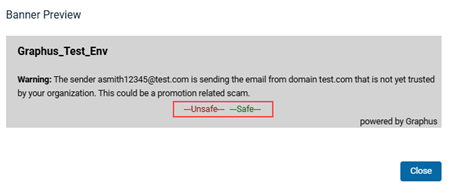
If the recipient selects Unsafe, the email remains quarantined. If they select Safe, the email is moved to their inbox and the Graphus AI is updated to trust future emails from that sender to that recipient.
IMPORTANT The EmployeeShield banner does not provide feedback options for emails that Graphus has identified as definitively malicious.
- In the Message section, with Graphus Generated Messaging (Recommended) selected, the banner content will automatically update to describe the type of phishing that is detected. With the Custom Message (Static) option, you can provide your own custom banner content in the text box that will be displayed. The content will not change based on the phishing type that is detected.

- By default, the Skip Recipient Authentication check box is not selected. Therefore, recipients are required to authenticate to interact with EmployeeShield®.
- To review the settings, click the Preview Banner button.
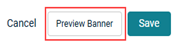
Note: You can preview the banner at any point while setting banner options. - When you are done, click Save. A confirmation message will be displayed.

Configuring the Graphus Feedback app for M365
IMPORTANT These steps are not applicable when setting up the EmployeeShield banner in a Google Workspace organization.
The Graphus Feedback app must be configured for each M365 organization for which you enable the EmployeeShield banner. Configuration will prevent recipients from being prompted for admin consent when providing feedback through the EmployeeShield banner.
To configure the Graphus Feedback app:
- In the following URL, replace the organizationdomain with the customer's domain.
https://login.microsoftonline.com/organizationdomain/adminconsent?client_id=b920c33e-e265-4b0d-94ca-93424a94a47b
EXAMPLE The URL for companya.com would be:
https://login.microsoftonline.com/companya.com/adminconsent?client_id=b920c33e-e265-4b0d-94ca-93424a94a47b
- Access the URL in your browser.
- Log into 0365 with the organization domain's admin credentials.
- In the Permissions requested modal, click the Accept button. The feedback app will be provisioned to the organization domain and EmployeeShield will not prompt recipients for admin permission.


