Group Protection Guide
This article explains the Group Protection feature and how to create groups in Microsoft 365 and Google Workspace.
Prerequisites
Permission to create a Group in Microsoft 365 or Google Workspace.
Group Protection feature
By default, Graphus protects all of an organization's users. However, with the Group Protection feature, customers can provide email protection to a subset of organization users. First, you identify a subset of users to protect. Then, add those users to a group in Microsoft 365 or Google Workspace. Finally, configure the group in Graphus.
After Group Protection is enabled for an organization, Graphus will start protecting only the list of users in the group. The count of protected users will be reflected on the Dashboard page in the Inboxes Protected table. 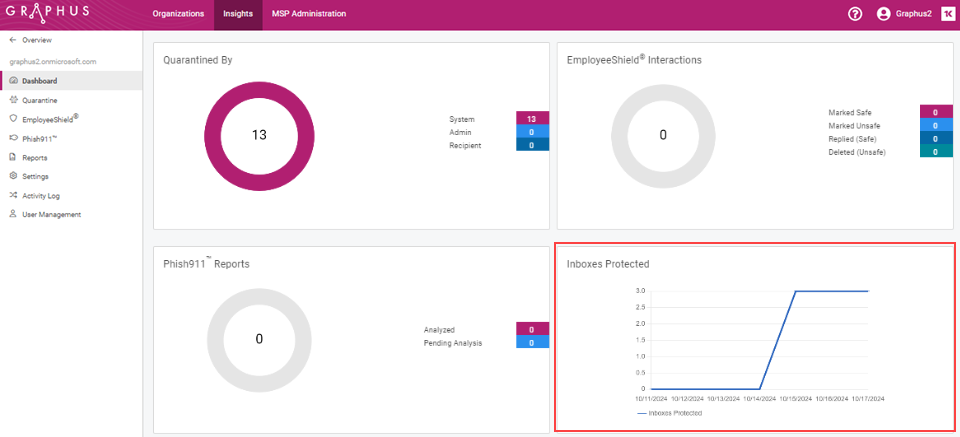
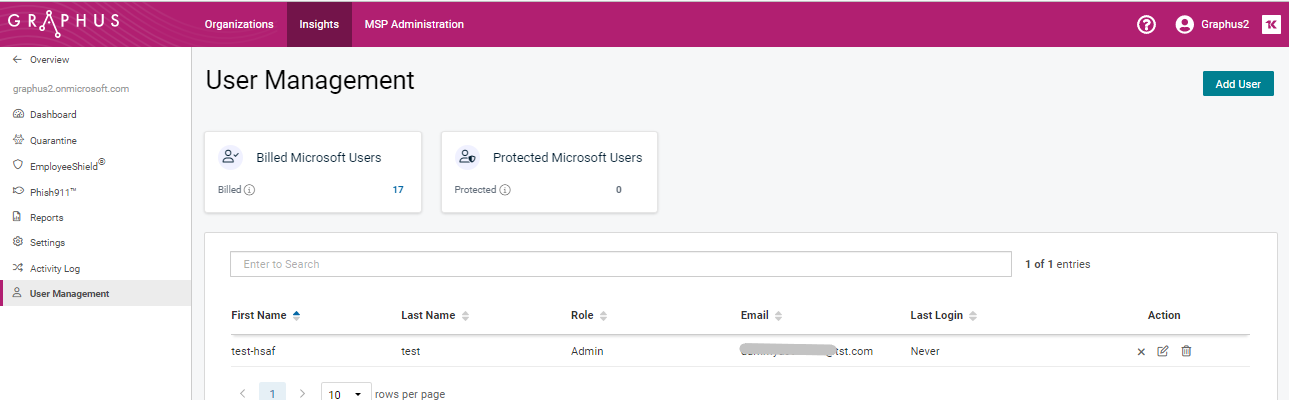
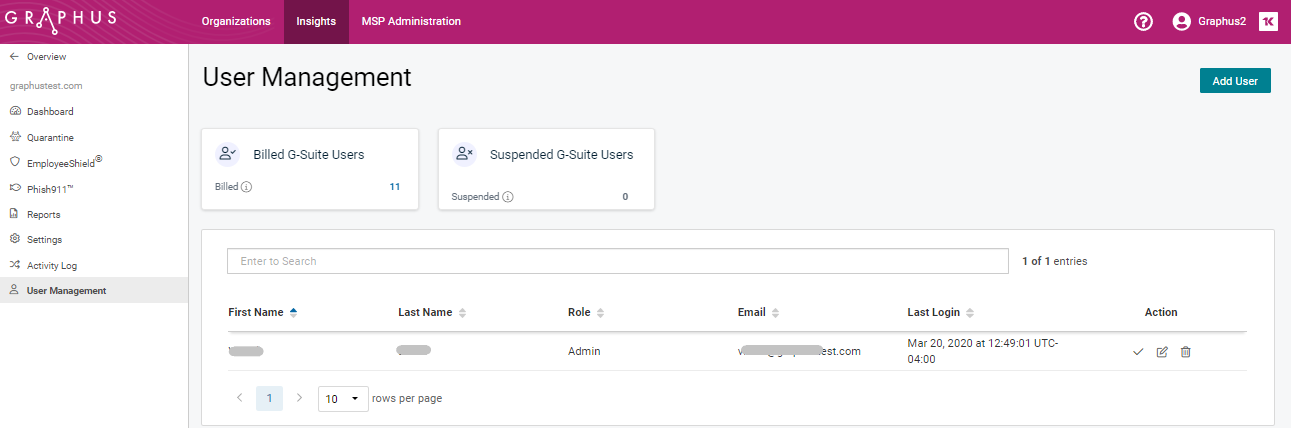
More details about the protected users can be found on the organization's User Management page.
Microsoft 365 organization User Management page
Google Workspace organization User Management page
How to...
Follow the below steps to create a group in Microsoft 365 (you can refer to this link for more details to Create Group Microsoft 365):
- Go to the Admin center (https://go.microsoft.com/fwlink/p/?linkid=2052855), expand Groups, and Click Add a group.
- On Choose a Group type page, select Microsoft 365 and click Next.
- On the Basics page, type a name for the group and a description (optional). Then click Next.
- On the Edit settings page, type a unique email address for the group. On the Owners, choose the name of one or more people designated to manage the group. Then click Next.
- After reviewing your settings and making any changes, click Create Group.
- Click Close.
- To add Members to group Microsoft 365, Go to the admin center, refresh the page so your new group appears, and then select the name of the group that you want to add members to.
- On the Members tab, select View All and manage members.
- Click Add Members.
- Select the users you want to add, and then click Save.
IMPORTANT If you are using Phish911, you must add the email address of the dedicated Phish911 inbox to the protected group. Otherwise, Phish911 will not work.
- Click Close.
Follow the below steps to create a group in Google Workspace (you can refer to this link for more details to Create Group Google Workspace):
- Go to the Google Admin console (https://admin.google.com). On the Admin console Home page, go to Groups.
- Click Create Group.
- Wait a few minutes for your new group to become active.
- To add Members to the group, click the link to add members to your new group.
- For users or groups, enter the first few characters of their email addresses. When you see the user or group you want, you can select them.
- For service accounts, you can enter the complete email address.
- Repeat the previous step to find more members.
IMPORTANT If you are using Phish911, you must add the email address of the dedicated Phish911 inbox to the protected group. Otherwise, Phish911 will not work.
- Click Add to Group.
- On the top navigation bar, click Insights.
- Click the name of the applicable organization.
- In the navigation pane, click Settings > General Settings.
- Click the Group Protection tab.
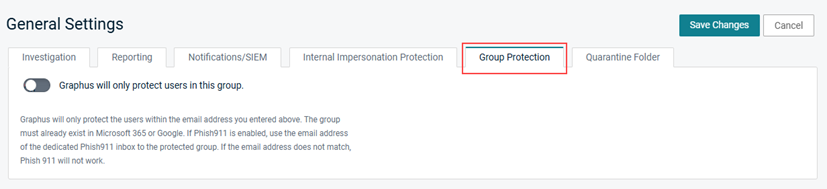
- Click the group protection toggle to enable it.
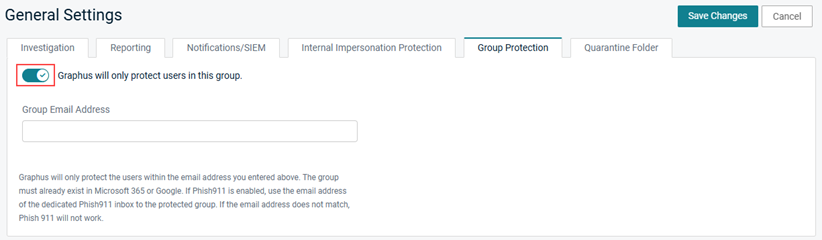
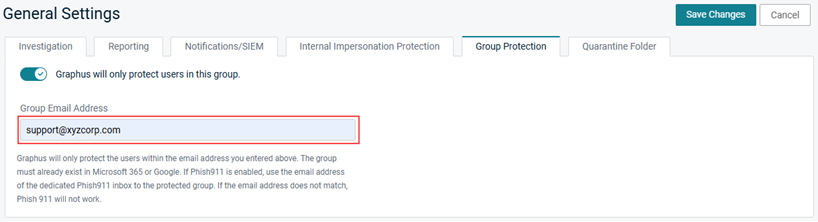
- In the Group Email Address field, enter the group's email address.
- Click Save Changes.
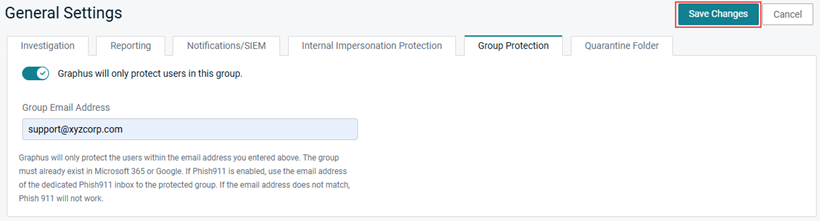
A message is displayed indicating the settings were saved successfully.


